Step 2 — Add the app from Git and deploy
This step adds the main app (website + API) and deploys it. Follow the screens in order.
Table of contents
- Add a resource
- Pick Public Repository
- Enter the repo URL
- Use Dockerfile and continue
- Set the name and domain
- Set port 2000
- Add MONGODB_URI
- Check the env is saved
- Deploy and wait
- Open the live website
- Add an AI key
2.1 Add a resource
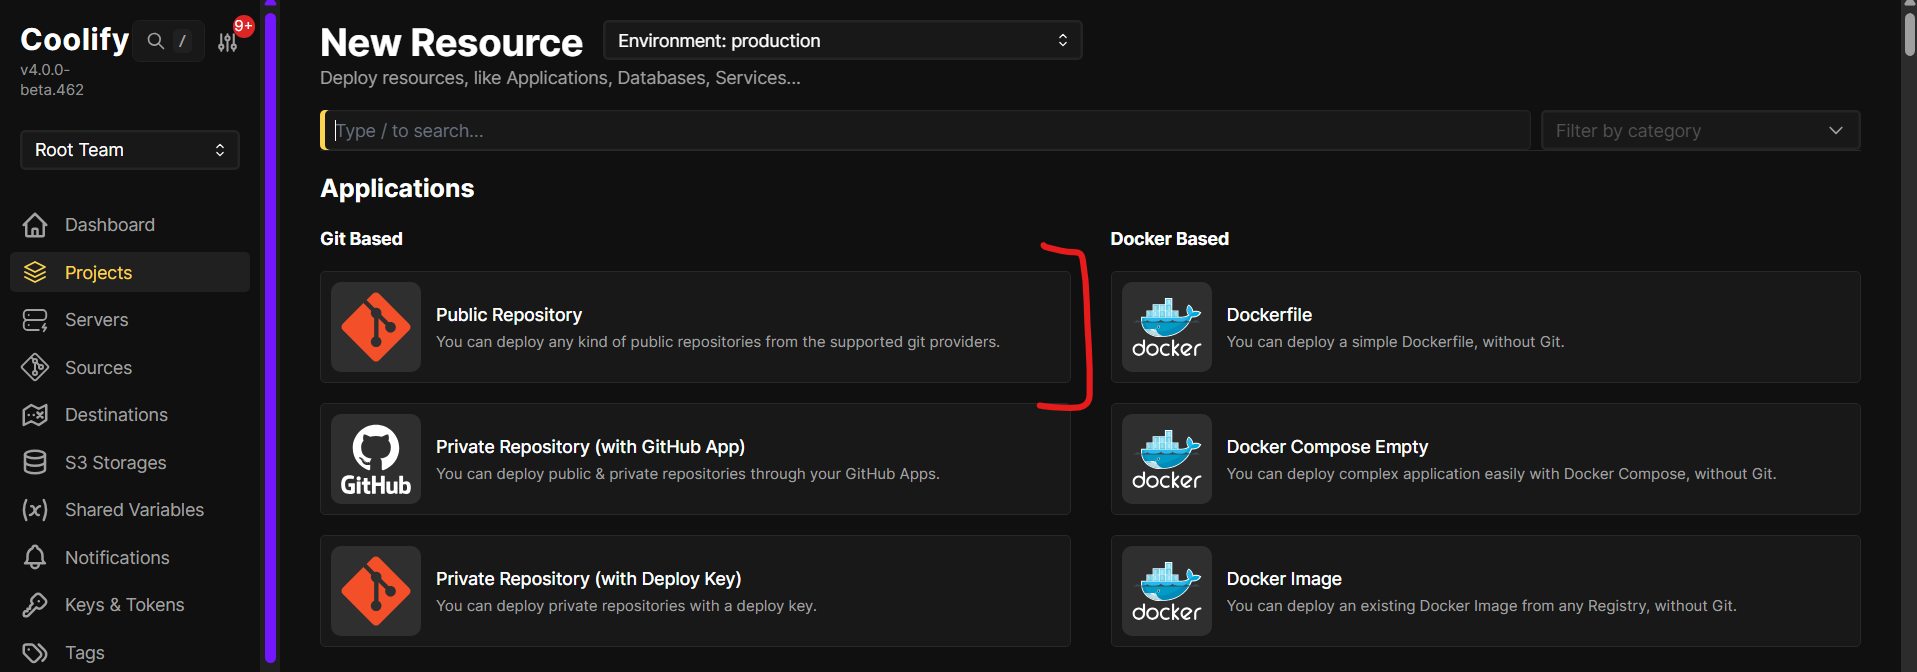
In the project, click + Add Resource.

2.2 Pick Public Repository
Under Git Based, click Public Repository.
Coolify will clone the code from GitHub and build it.
2.3 Enter the repo URL
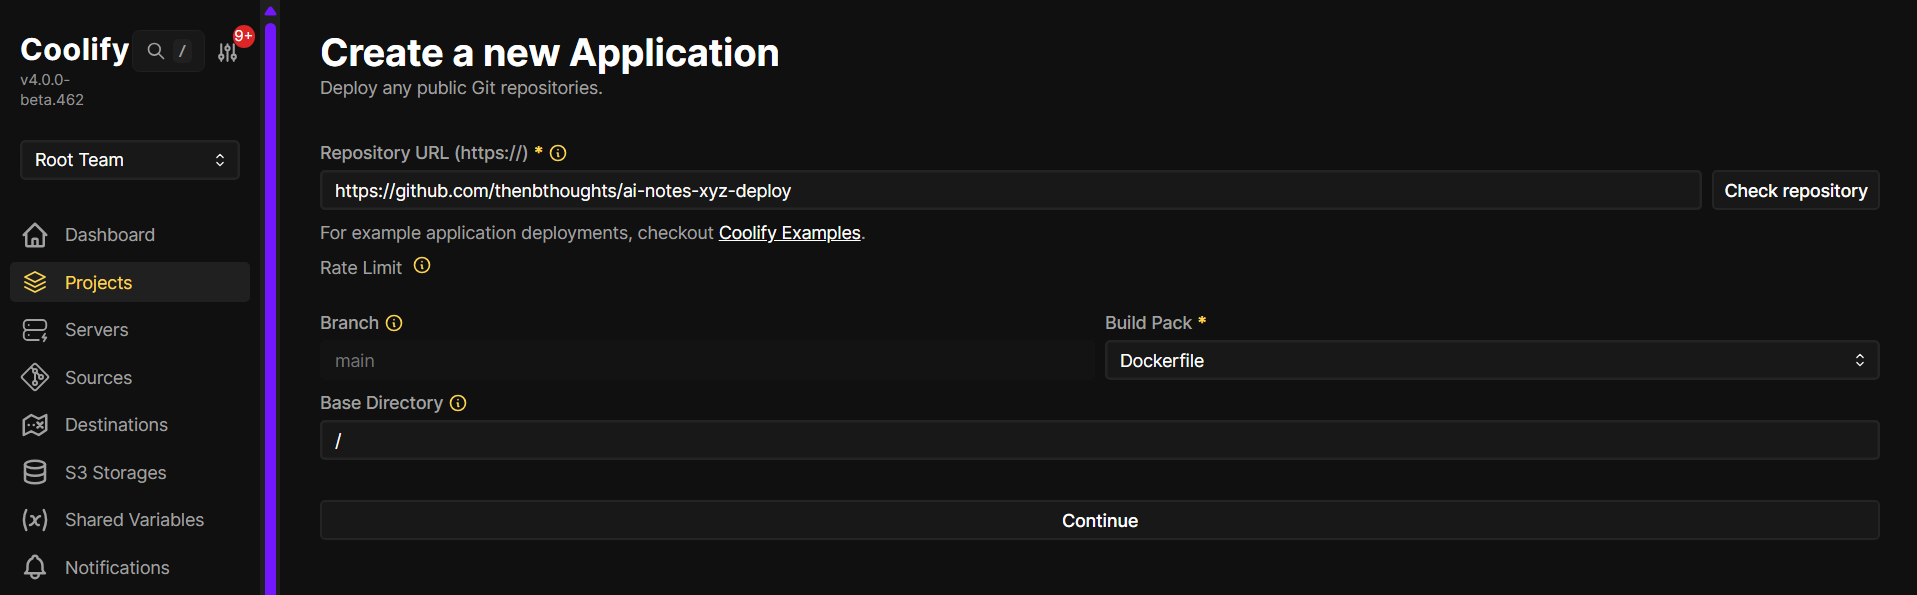
Set the repository URL to:
https://github.com/thenbthoughts/ai-notes-xyz-deploy
Click Check repository.
This image builds the website and the API together. When Docker builds, it clones the client and API from GitHub. It does not use folders on your laptop.

2.4 Use Dockerfile and continue
Set Build Pack to Dockerfile. Leave Base Directory as /.
Click Continue.
2.5 Set the name and domain
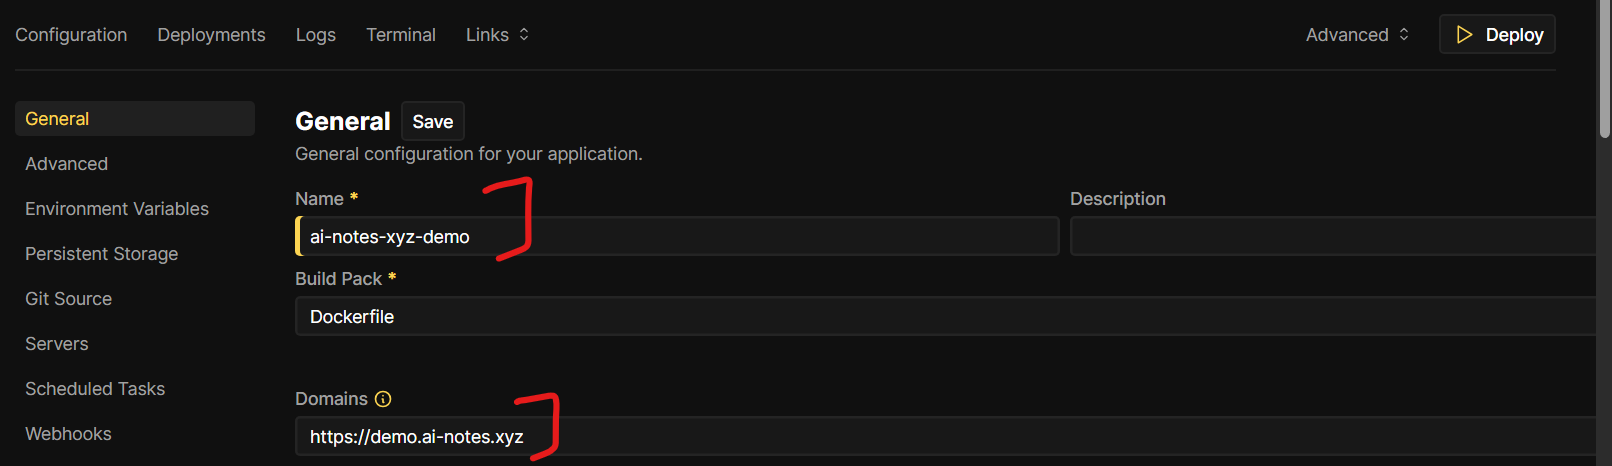
On General, set a name (for example ai-notes-xyz-demo).
Set Domains to your public URL, for example https://notes.example.com.
Point that domain at your Coolify server (DNS A record). Coolify can put HTTPS in front of the app.
Click Save.
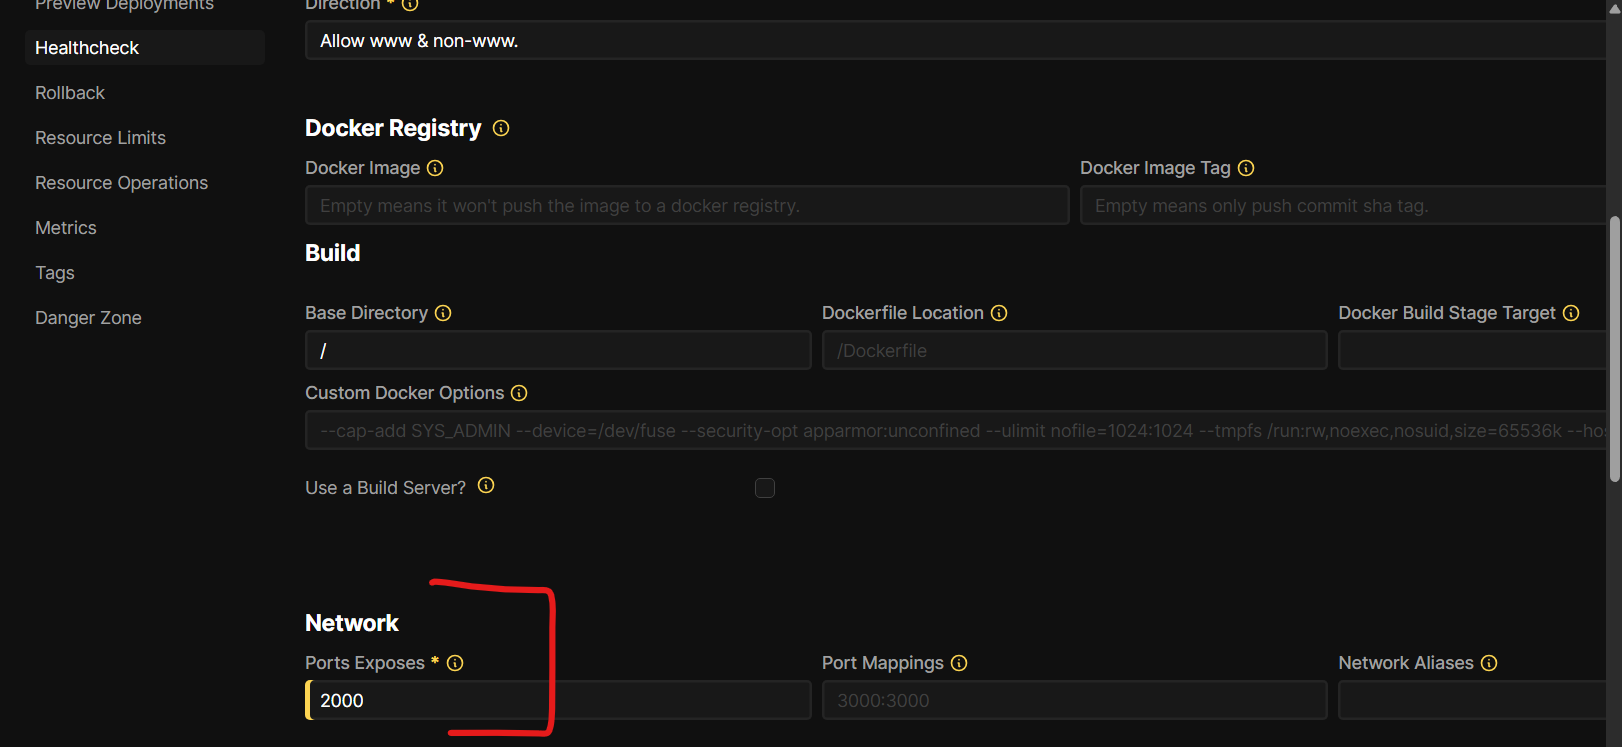
2.6 Set port 2000
Find Ports Exposes. Set it to 2000.
The app listens on port 2000. That is both the website and /api. Do not use port 3000.
2.7 Add MONGODB_URI
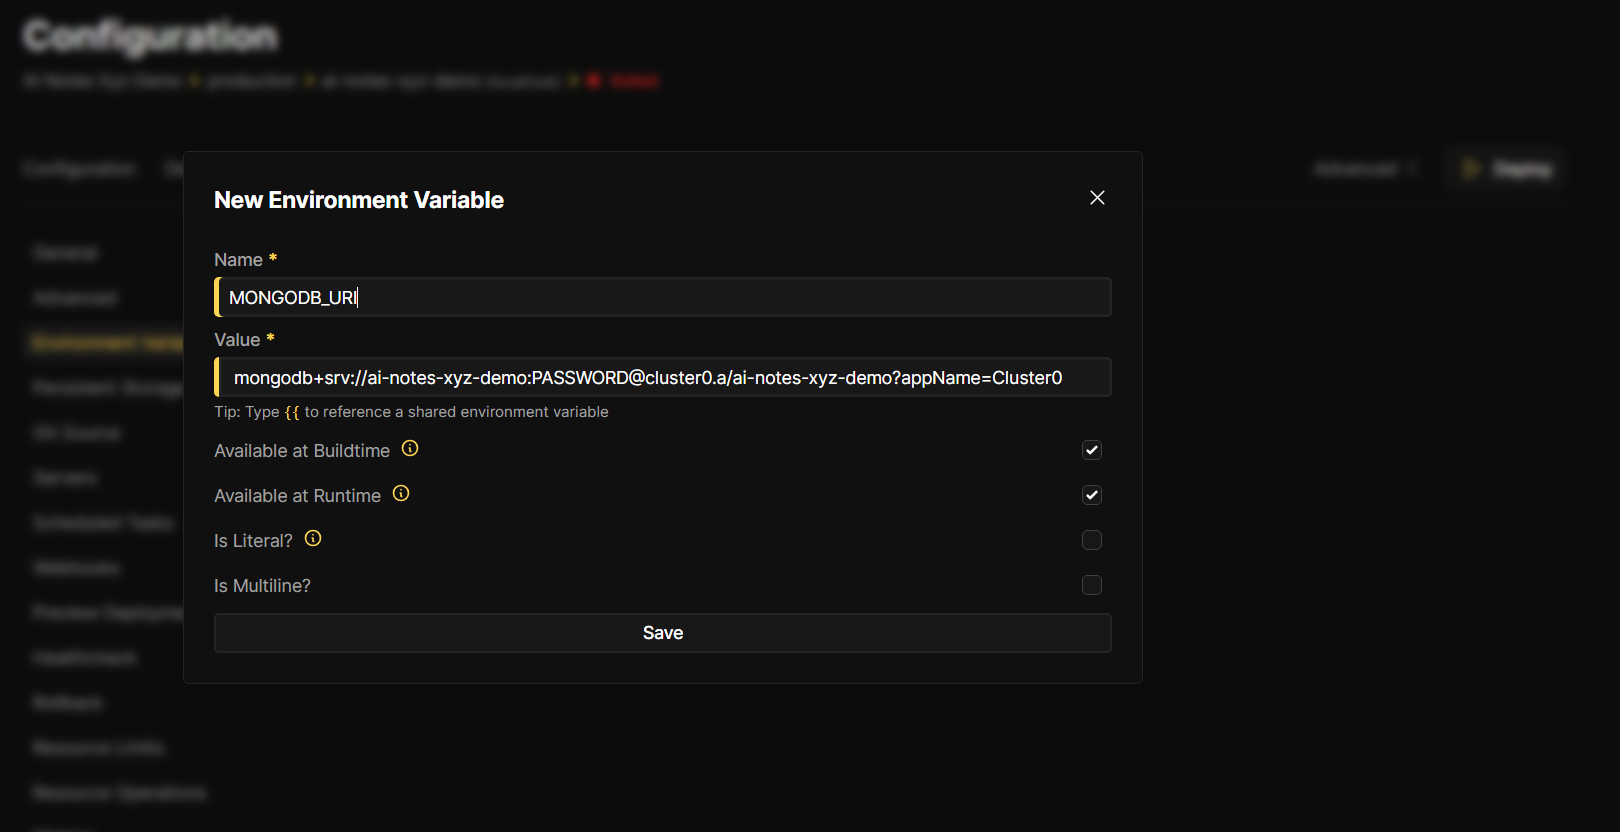
Open Environment Variables. Click + Add.
Add one required variable:
- Name:
MONGODB_URI - Value: your MongoDB URL, for example:
mongodb://USERNAME:PASSWORD@HOST:27017/ai-notes-xyz?authSource=admin&directConnection=true
Replace USERNAME, PASSWORD, and HOST with your values.
Keep Available at Buildtime and Available at Runtime checked. Click Save.
MongoDB is the database. The app will not start without a working URL. Coolify does not create MongoDB for you.
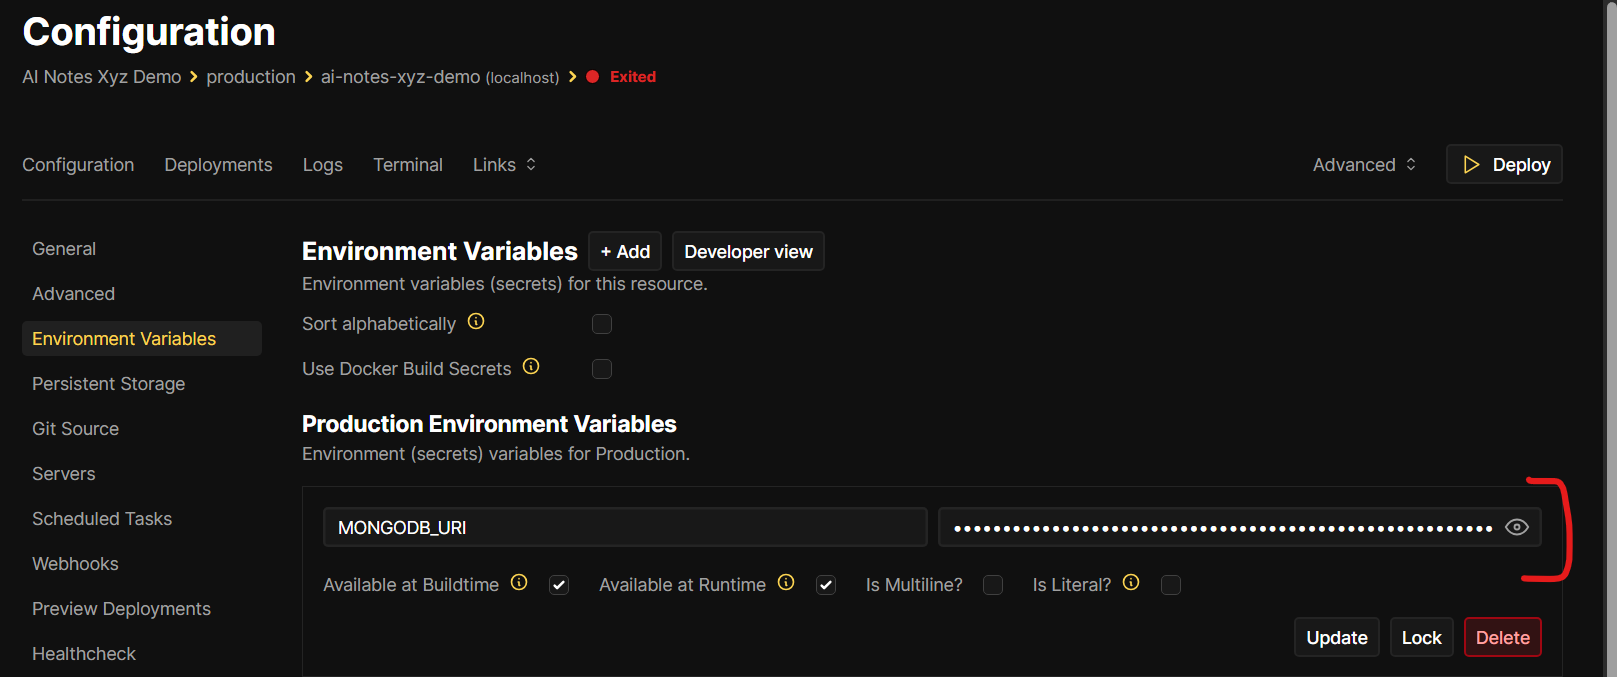
2.8 Check the env is saved
You should see MONGODB_URI in the list. The value is hidden. That is normal.
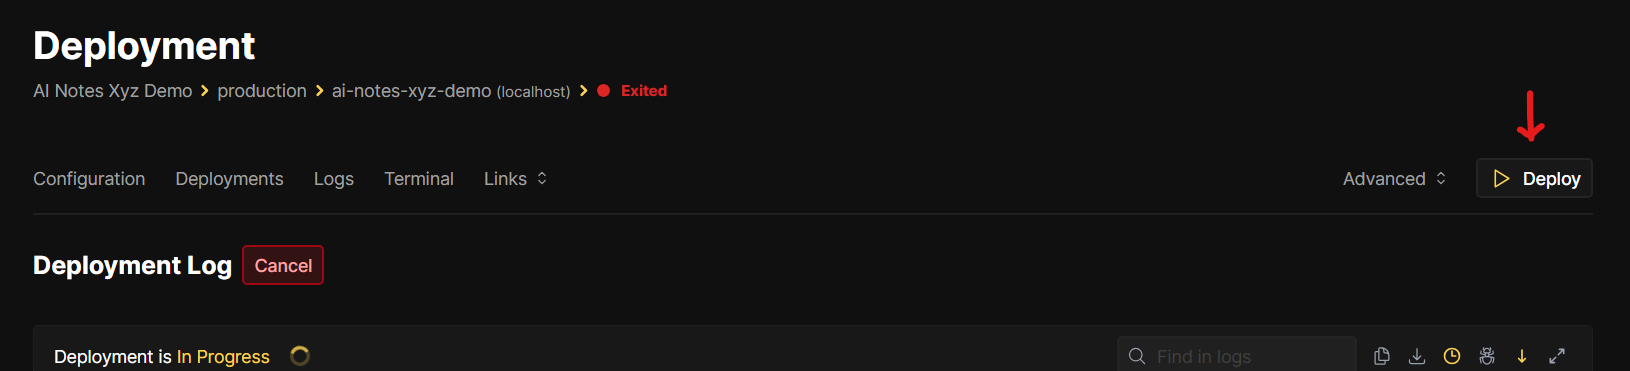
2.9 Deploy and wait
Click Deploy.
The first build is slow. Coolify clones GitHub, builds the website, then builds the API. Wait until the deploy is green.
If it fails, read the build log. A common cause is a bad MONGODB_URI, or a Git clone error.
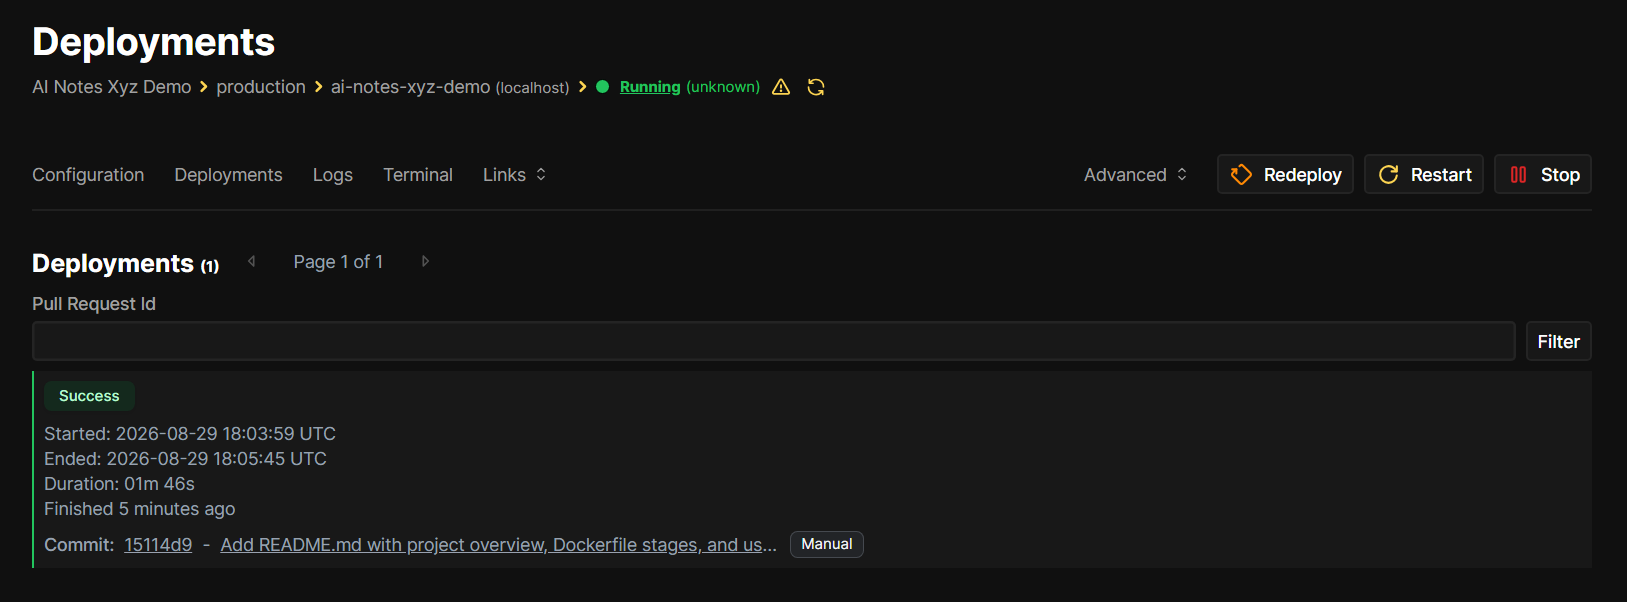
When it is done, Deployments should show Success, and the app should say Running.
2.10 Open the live website
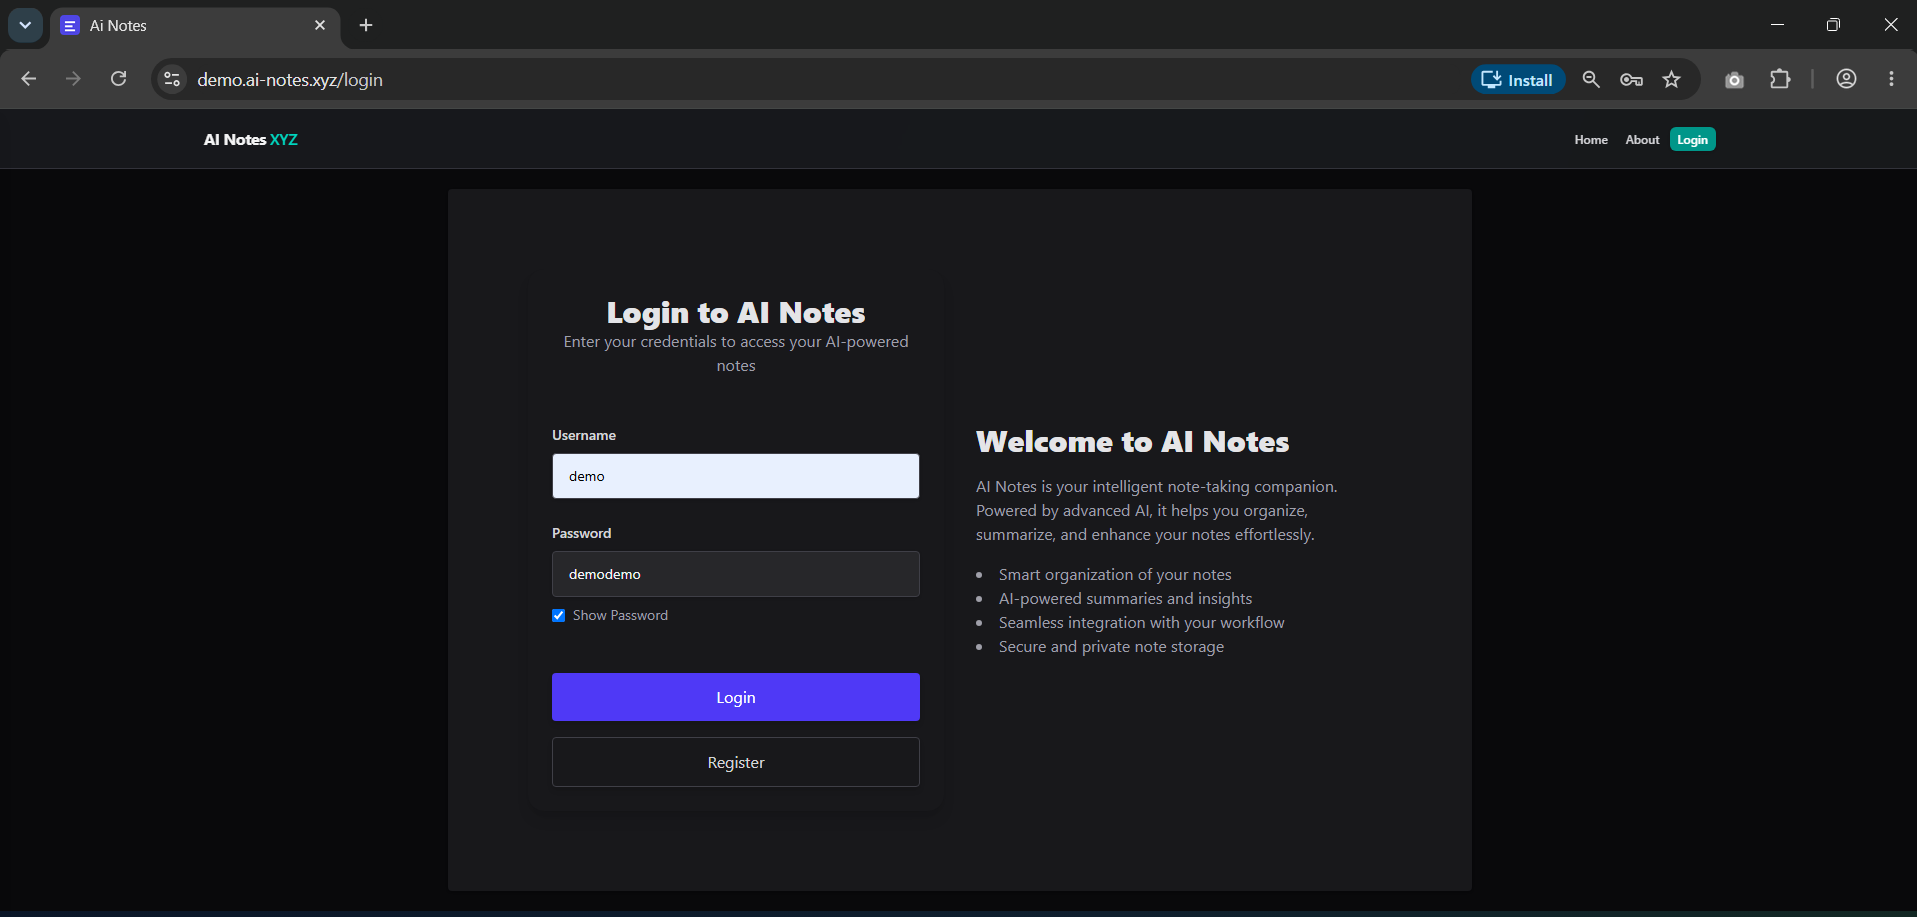
Open your domain in a browser. You should see the AI Notes login page.
Create an account, or log in if you already have one.
2.11 Add an AI key
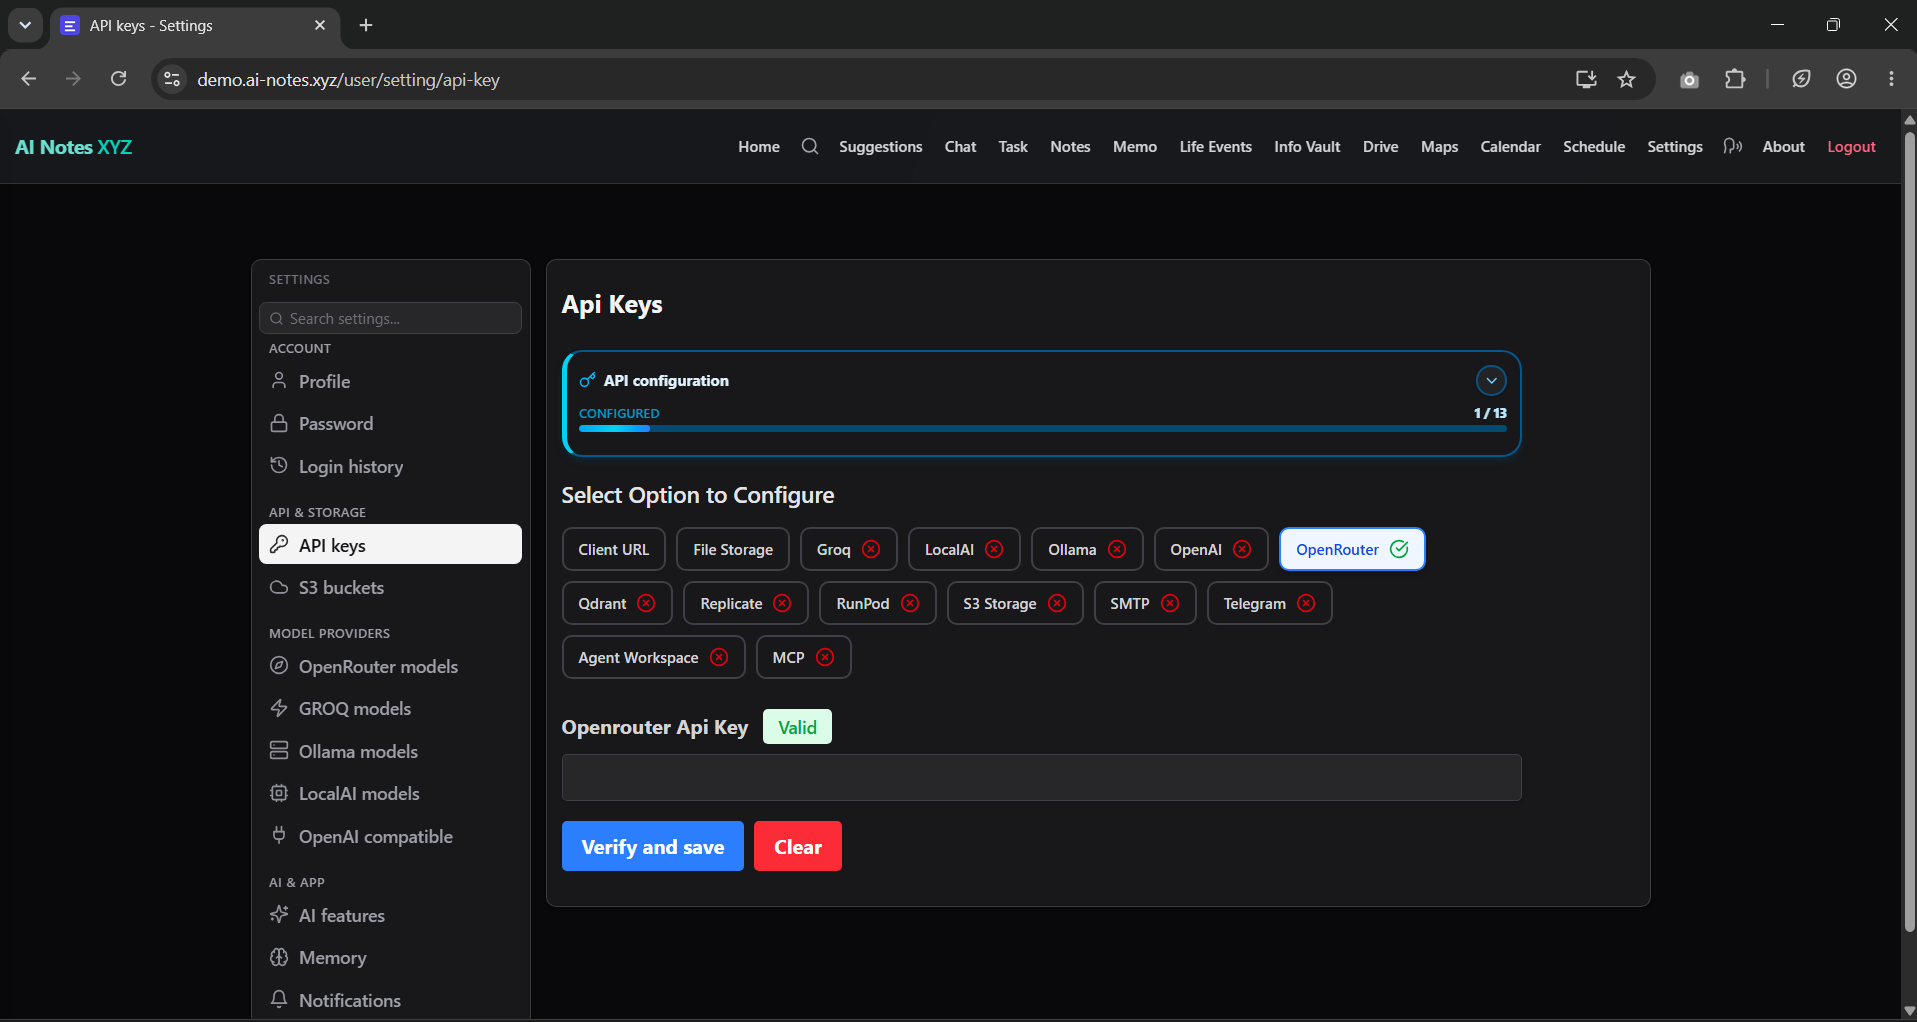
Go to Settings → API keys.
Add a key for chat:
- OpenRouter, or
- Groq, or
- Ollama, or
- an OpenAI-compatible key
Click Verify and save. A green Valid badge means it worked.
The app is now running. Stop here if you only want notes, tasks, and chat.