Step 3 — Add the workspace app from Git and deploy
This step is optional. Skip it if you only want notes, tasks, and chat.
The workspace is a second Coolify app. It is not the main website. It gives you the agent desktop and the workspace API.
Follow the screens in order.
Table of contents
- Add a resource
- Pick Public Repository
- Enter the workspace repo URL
- Use Dockerfile and continue
- Set the name, domains, and ports
- Set API_TOKEN, PASSWORD, and OPENCODE_SERVER_PASSWORD
- Add disk at /config
- Add DNS records
- Check domains
- Deploy and wait
- Connect Settings
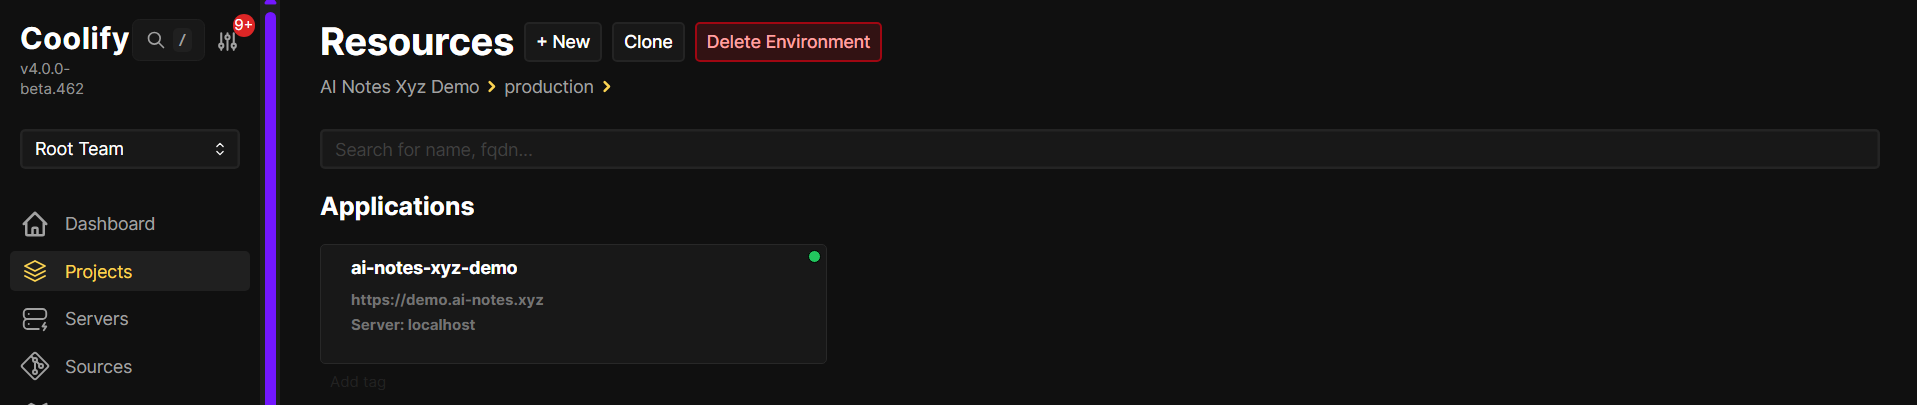
3.1 Add a resource
Stay in the same Coolify project you used for the main app.
Click + New.
3.2 Pick Public Repository
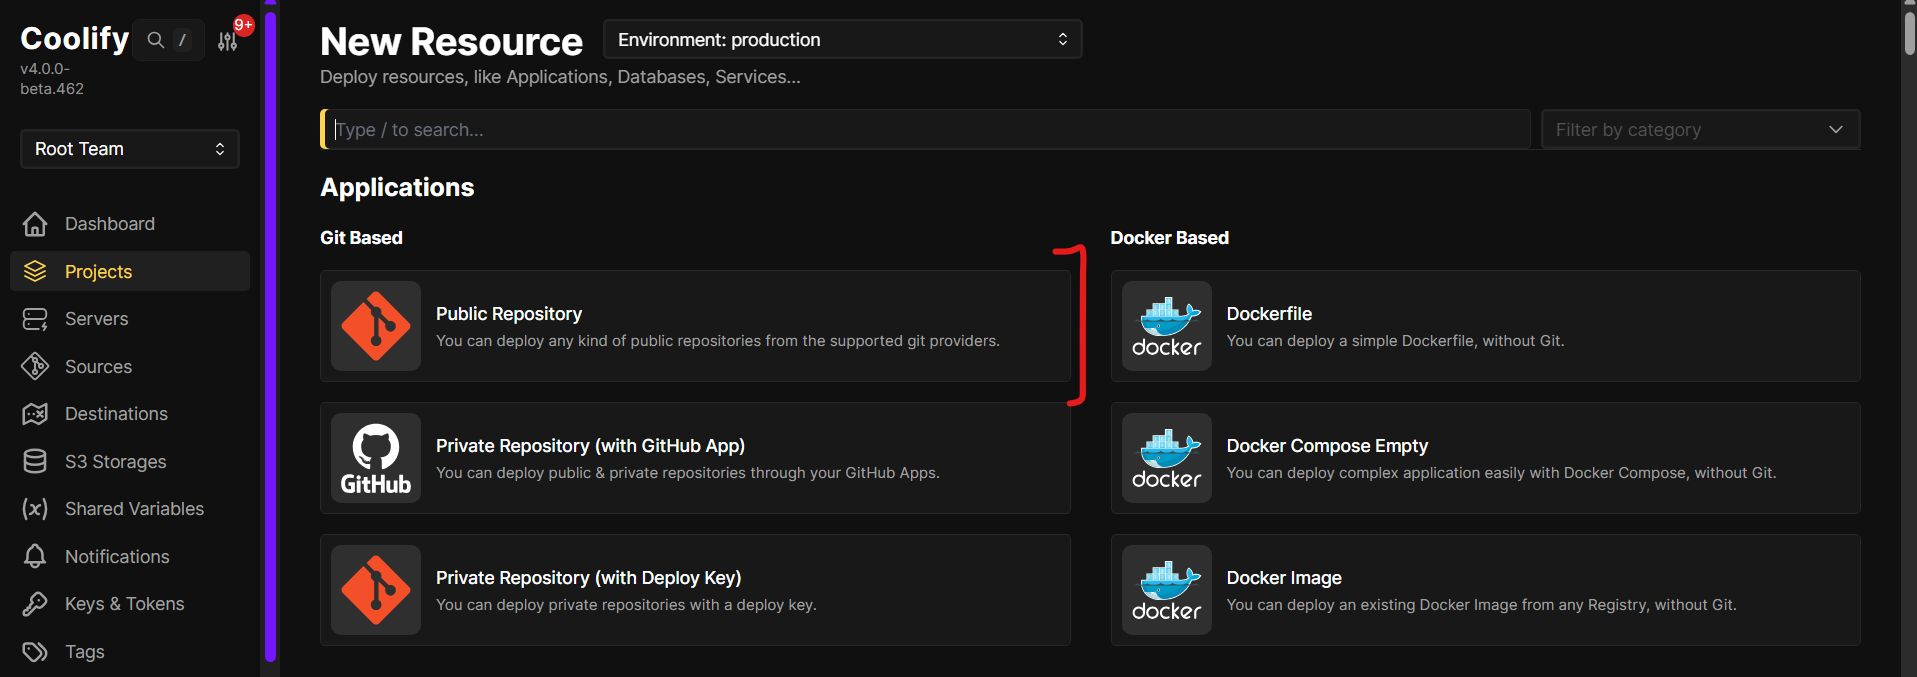
Under Git Based, click Public Repository.
Coolify will clone the workspace from GitHub and build it.
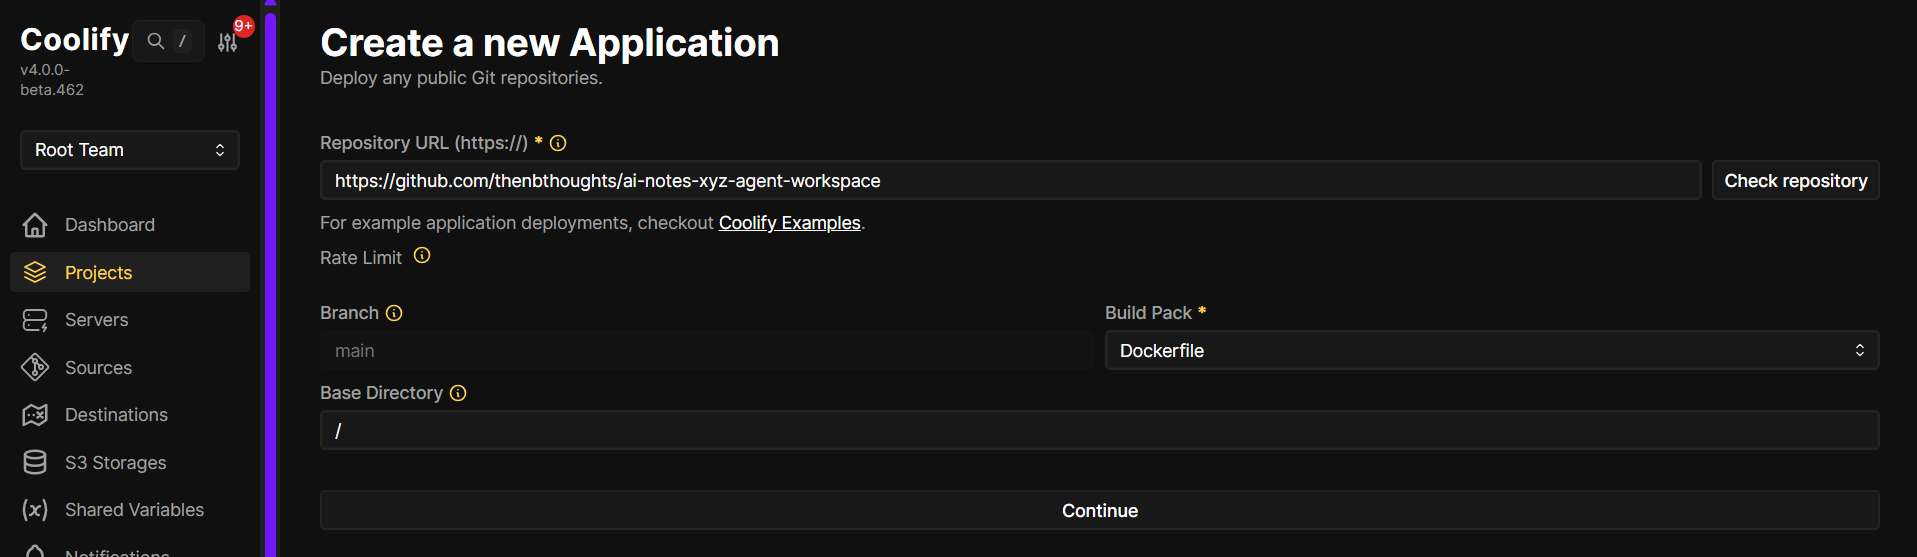
3.3 Enter the workspace repo URL
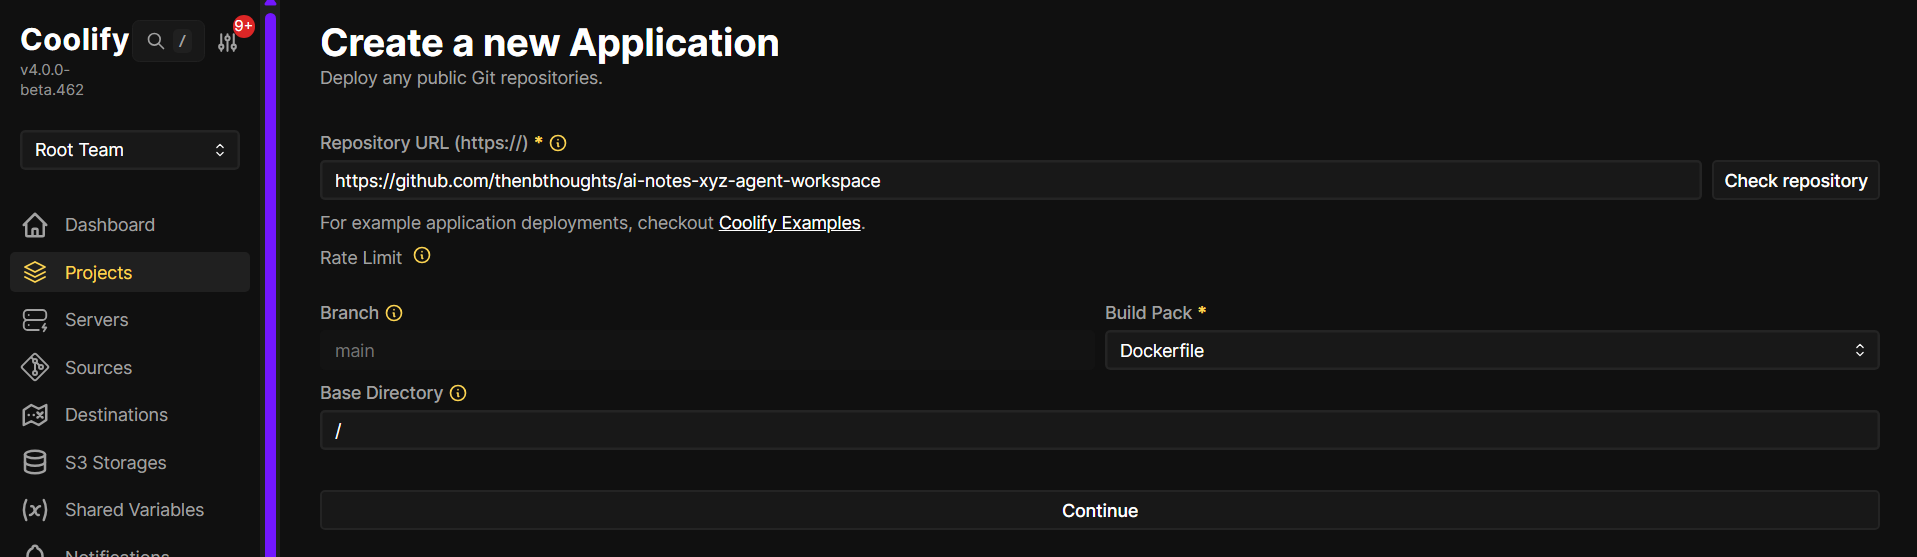
Set the repository URL to:
https://github.com/thenbthoughts/ai-notes-xyz-agent-workspace
Click Check repository.
Leave Branch as main.
3.4 Use Dockerfile and continue
Set Build Pack to Dockerfile. Leave Base Directory as /.
Do not set a custom start command. The image already starts the desktop and the workspace API.
Click Continue.
The first build can take 10 to 20 minutes. The image is large (desktop, browser, and tools).
3.5 Set the name, domains, and ports
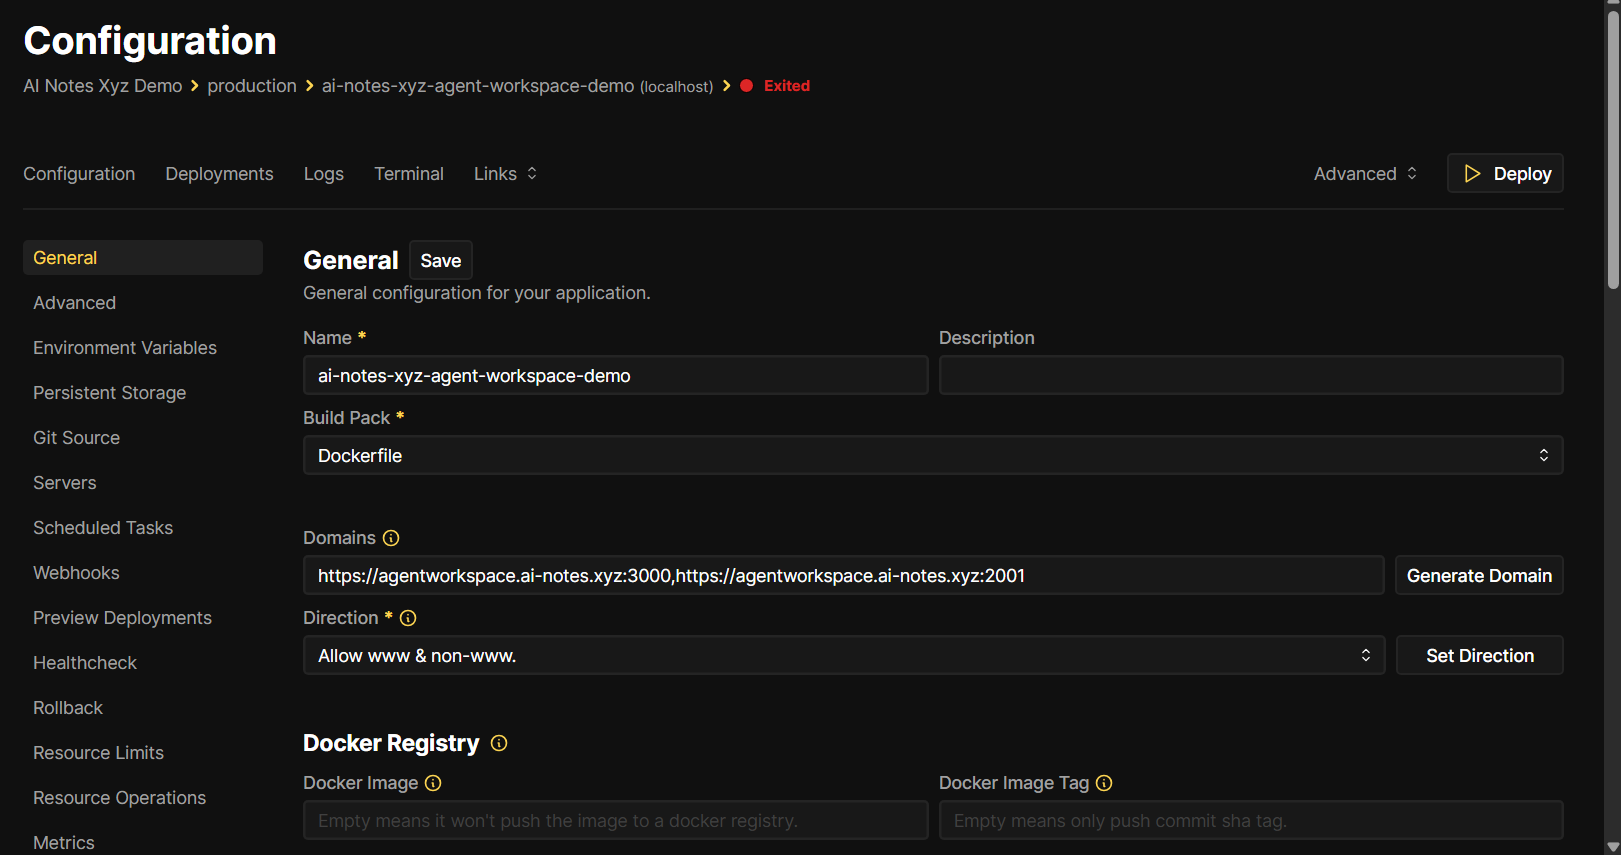
On General, set a name (for example ai-notes-xyz-agent-workspace-demo).
Leave Build Pack as Dockerfile.
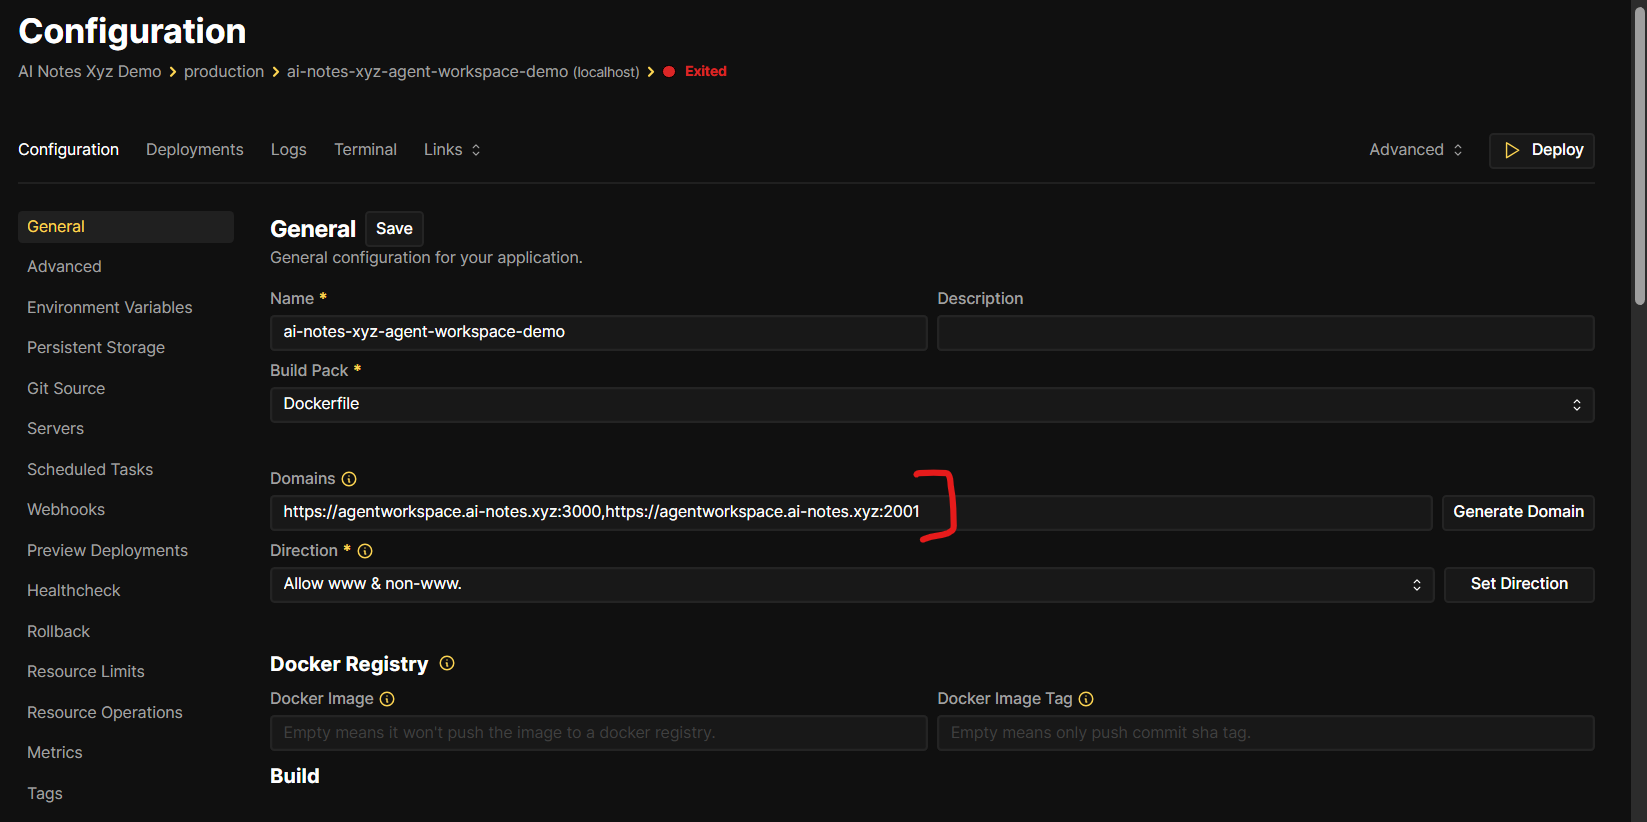
Set Domains to two public URLs, with the container port after each one:
https://workspace.example.com:3000,https://workspace-api.example.com:2001
| URL | Port | What it is |
|---|---|---|
https://workspace.example.com:3000 | 3000 | Desktop in the browser |
https://workspace-api.example.com:2001 | 2001 | Workspace API |
The :3000 and :2001 tell Coolify which port inside the container to use. People usually open the site on normal HTTPS (port 443). You do not type :3000 in the browser if Coolify is proxying for you.
Use two hostnames (one for the desktop, one for the API). That matches the Settings form later.
Do not put port 3001 on the public proxy. That port is a self-signed HTTPS desktop. Coolify already handles HTTPS.
Click Save.
3.6 Set API_TOKEN, PASSWORD, and OPENCODE_SERVER_PASSWORD
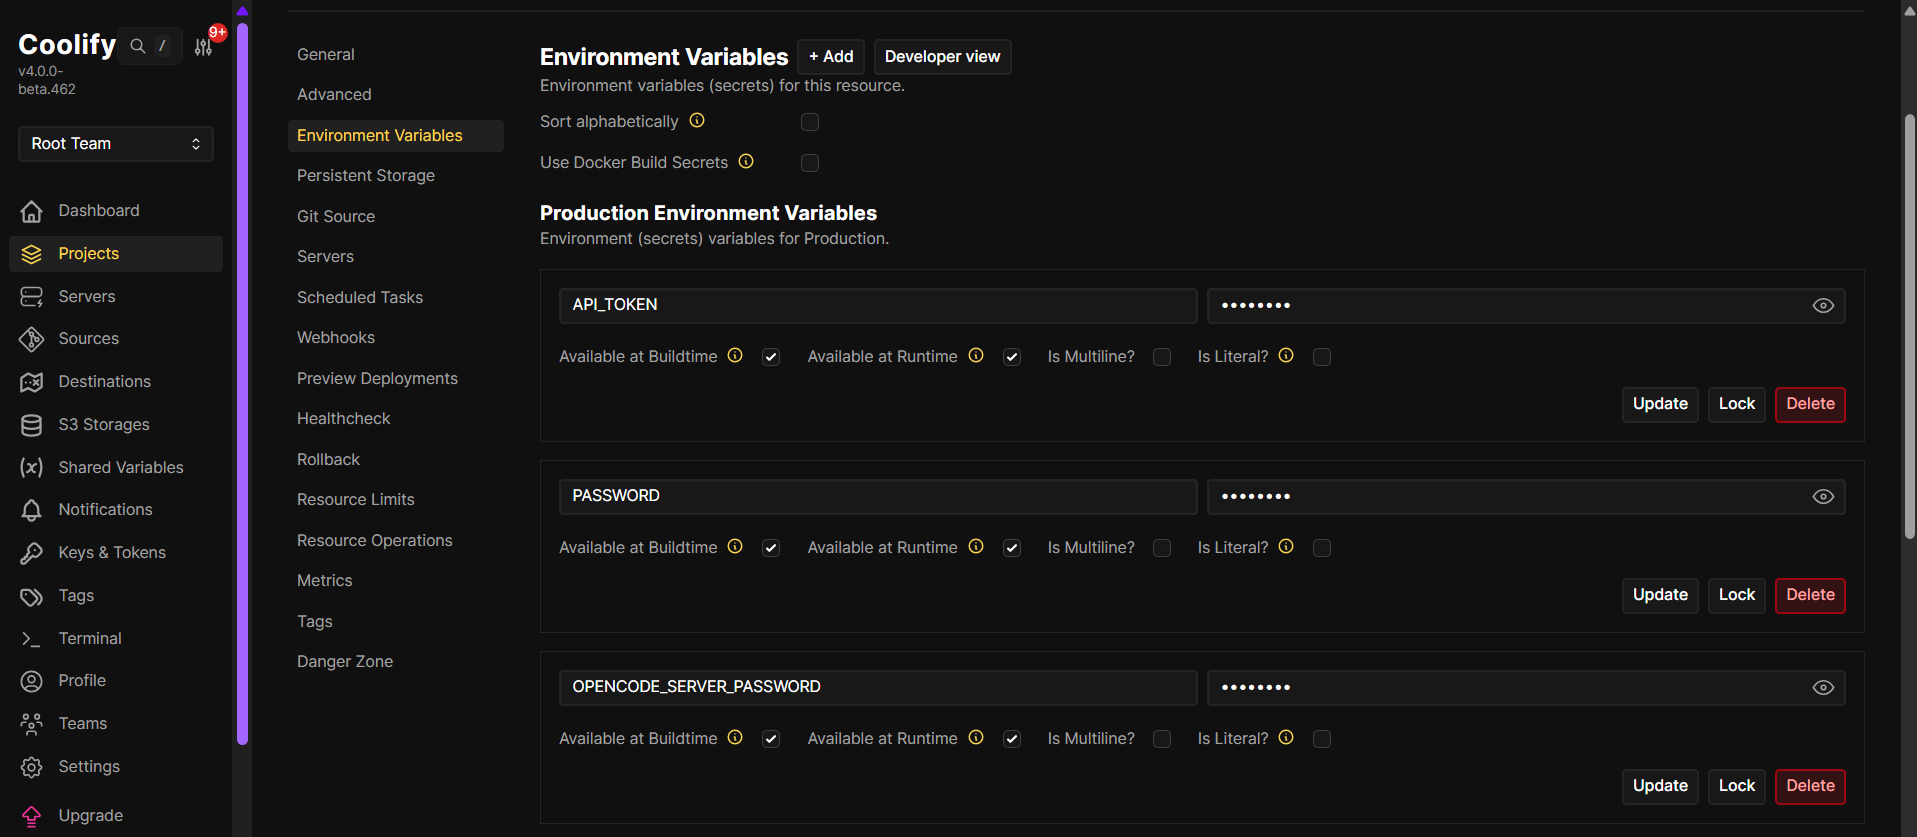
Open Environment Variables. Click + Add.
Add these three. Mark them as secret. Keep Available at Buildtime and Available at Runtime checked.
| Name | What it is |
|---|---|
API_TOKEN | A long random string. The main app sends this as X-API-Token. If it is empty, protected routes fail. |
PASSWORD | Login password for the desktop. Do not use the default agentworkspace on the public internet. |
OPENCODE_SERVER_PASSWORD | Password for OpenCode inside the workspace (the agent code runner). Do not use the default password on the public internet. |
The desktop login name is CUSTOM_USER. If you do not set it, it is abc.
Pick strong passwords. Anyone who can open the desktop can run commands in that container.
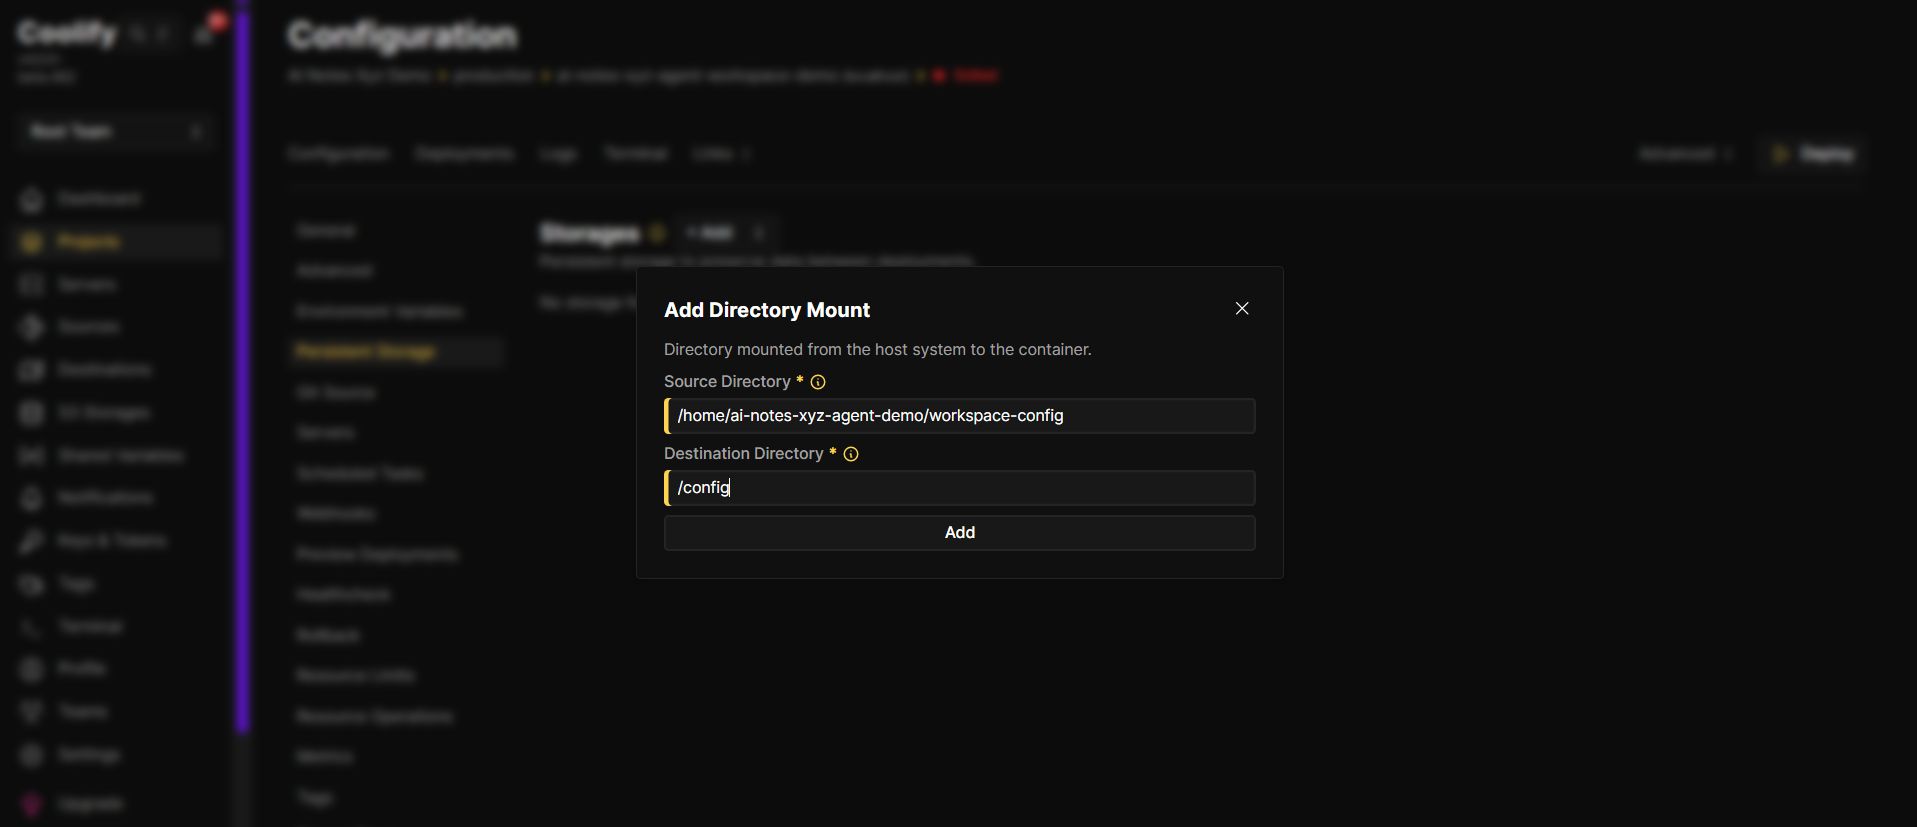
3.7 Add disk at /config
Open Persistent Storage.
If you see No storage found, click + Add, then Directory Mount.
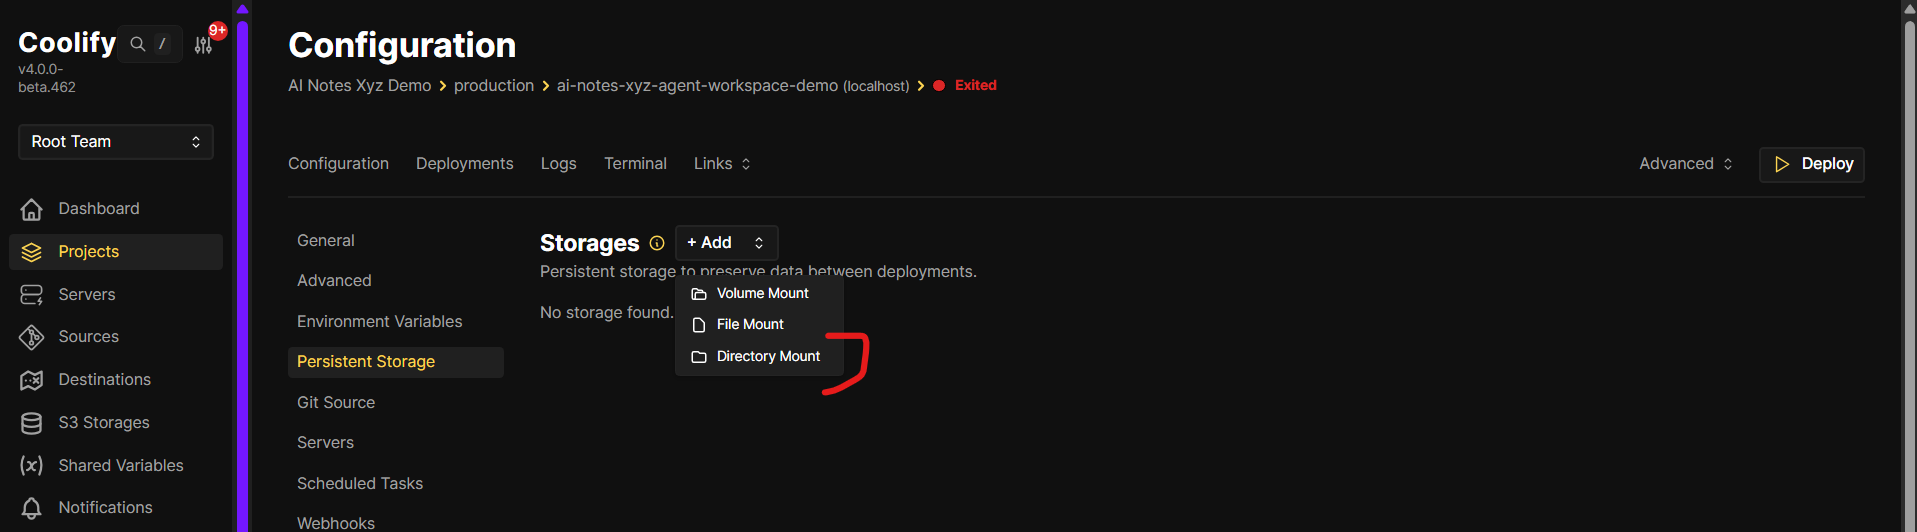
In Add Directory Mount:
- Source Directory — a folder on the Coolify server, for example
/home/YOUR_USER/workspace-config - Destination Directory —
/config
Click Add.
This folder keeps the desktop home and agent files. If you skip this, files can disappear when you redeploy.
3.8 Add DNS records
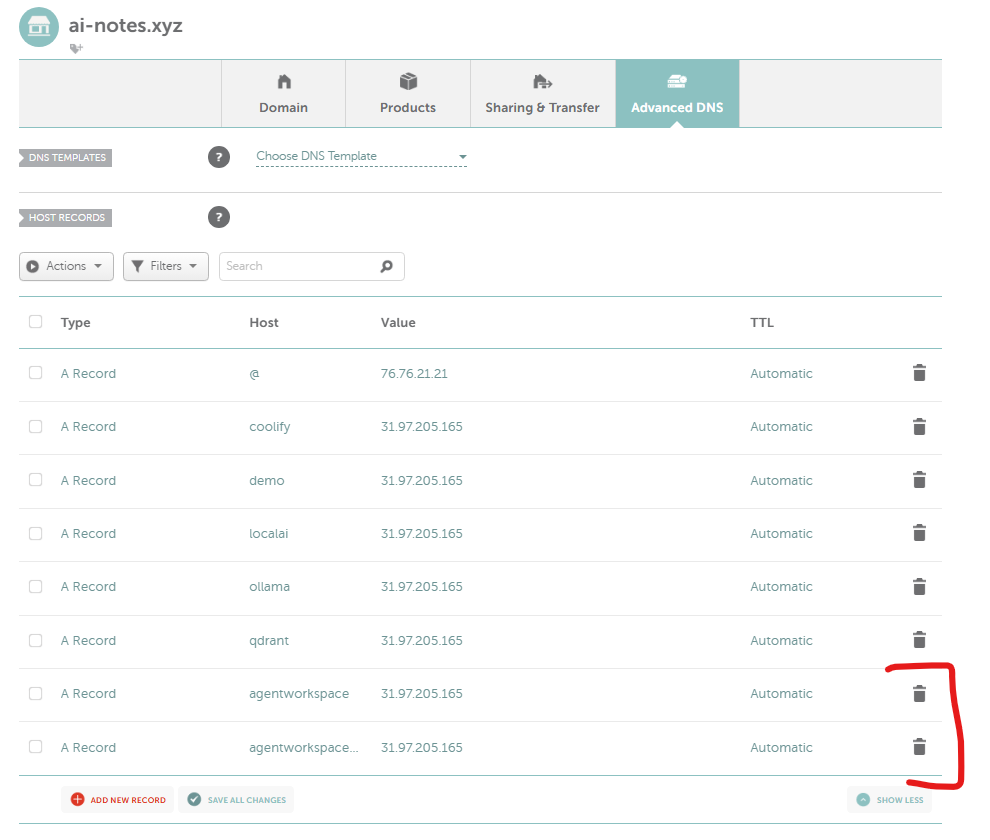
At your DNS host, add two A records. Point both at your Coolify server IP.
| Host | Points to |
|---|---|
workspace | your server IP |
workspace-api | your server IP |
Use the hostnames that match the domains you set in Coolify. Wait for DNS to update before you expect HTTPS to work.
3.9 Check domains
Go back to General. Confirm Domains still has both URLs, with :3000 on the desktop host and :2001 on the API host.
3.10 Deploy and wait
Click Deploy.
The first build is slow. Wait until the log finishes.
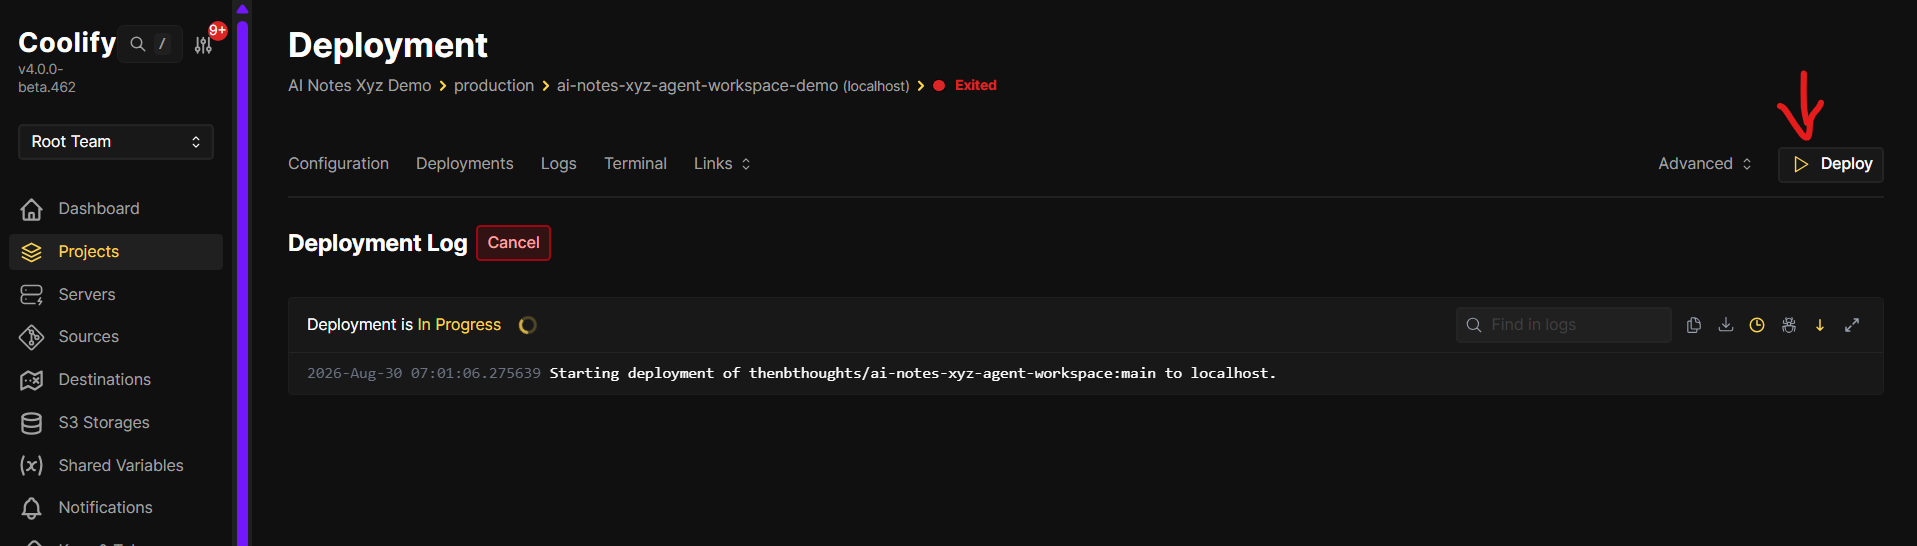
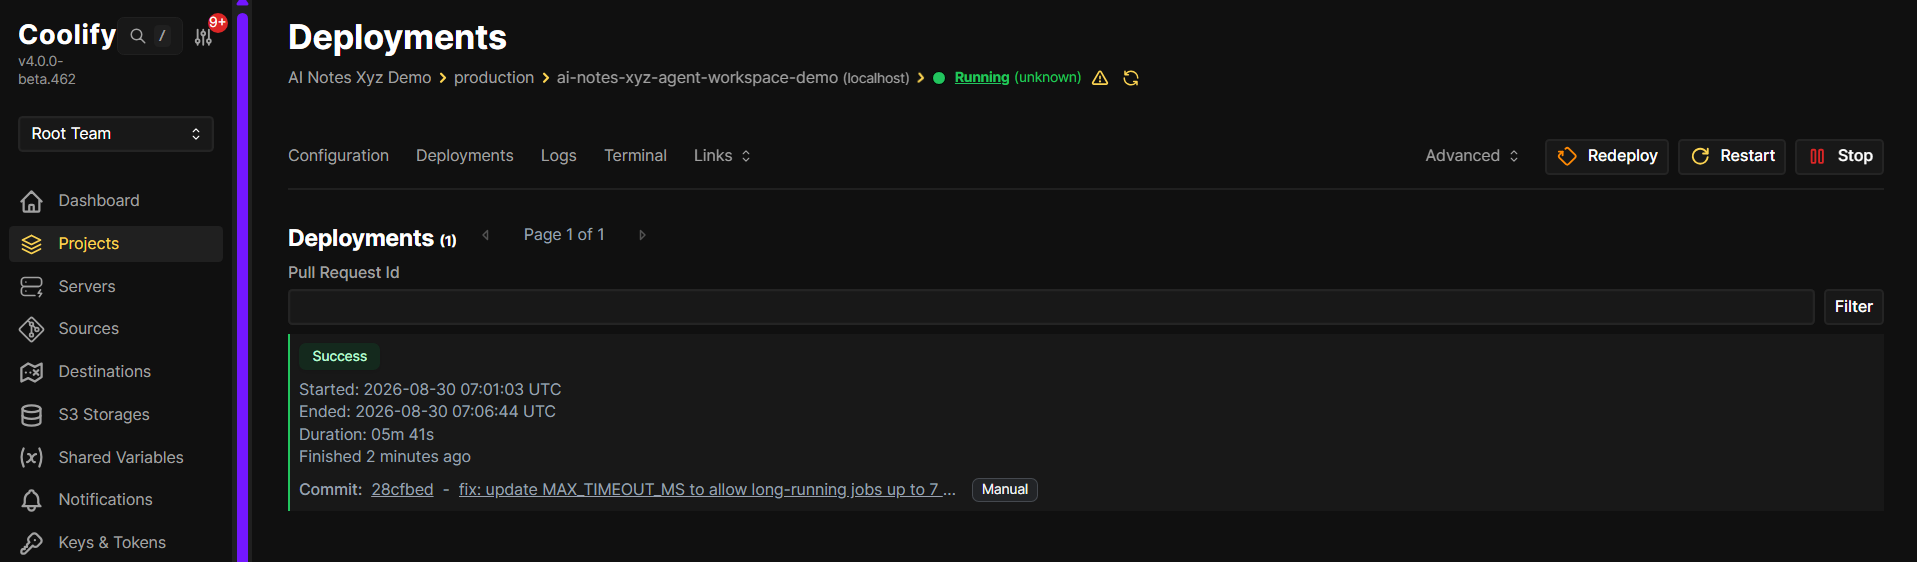
When it is done, Deployments should show Success, and the app should say Running.
Check:
- Open the API URL at
/api/. You should see a welcome text. - Open the desktop URL. Log in with
CUSTOM_USER(defaultabc) and yourPASSWORD.
The desktop uses a live connection (WebSockets). If the page loads but the screen stays black, check that WebSockets are not blocked.
3.11 Connect Settings
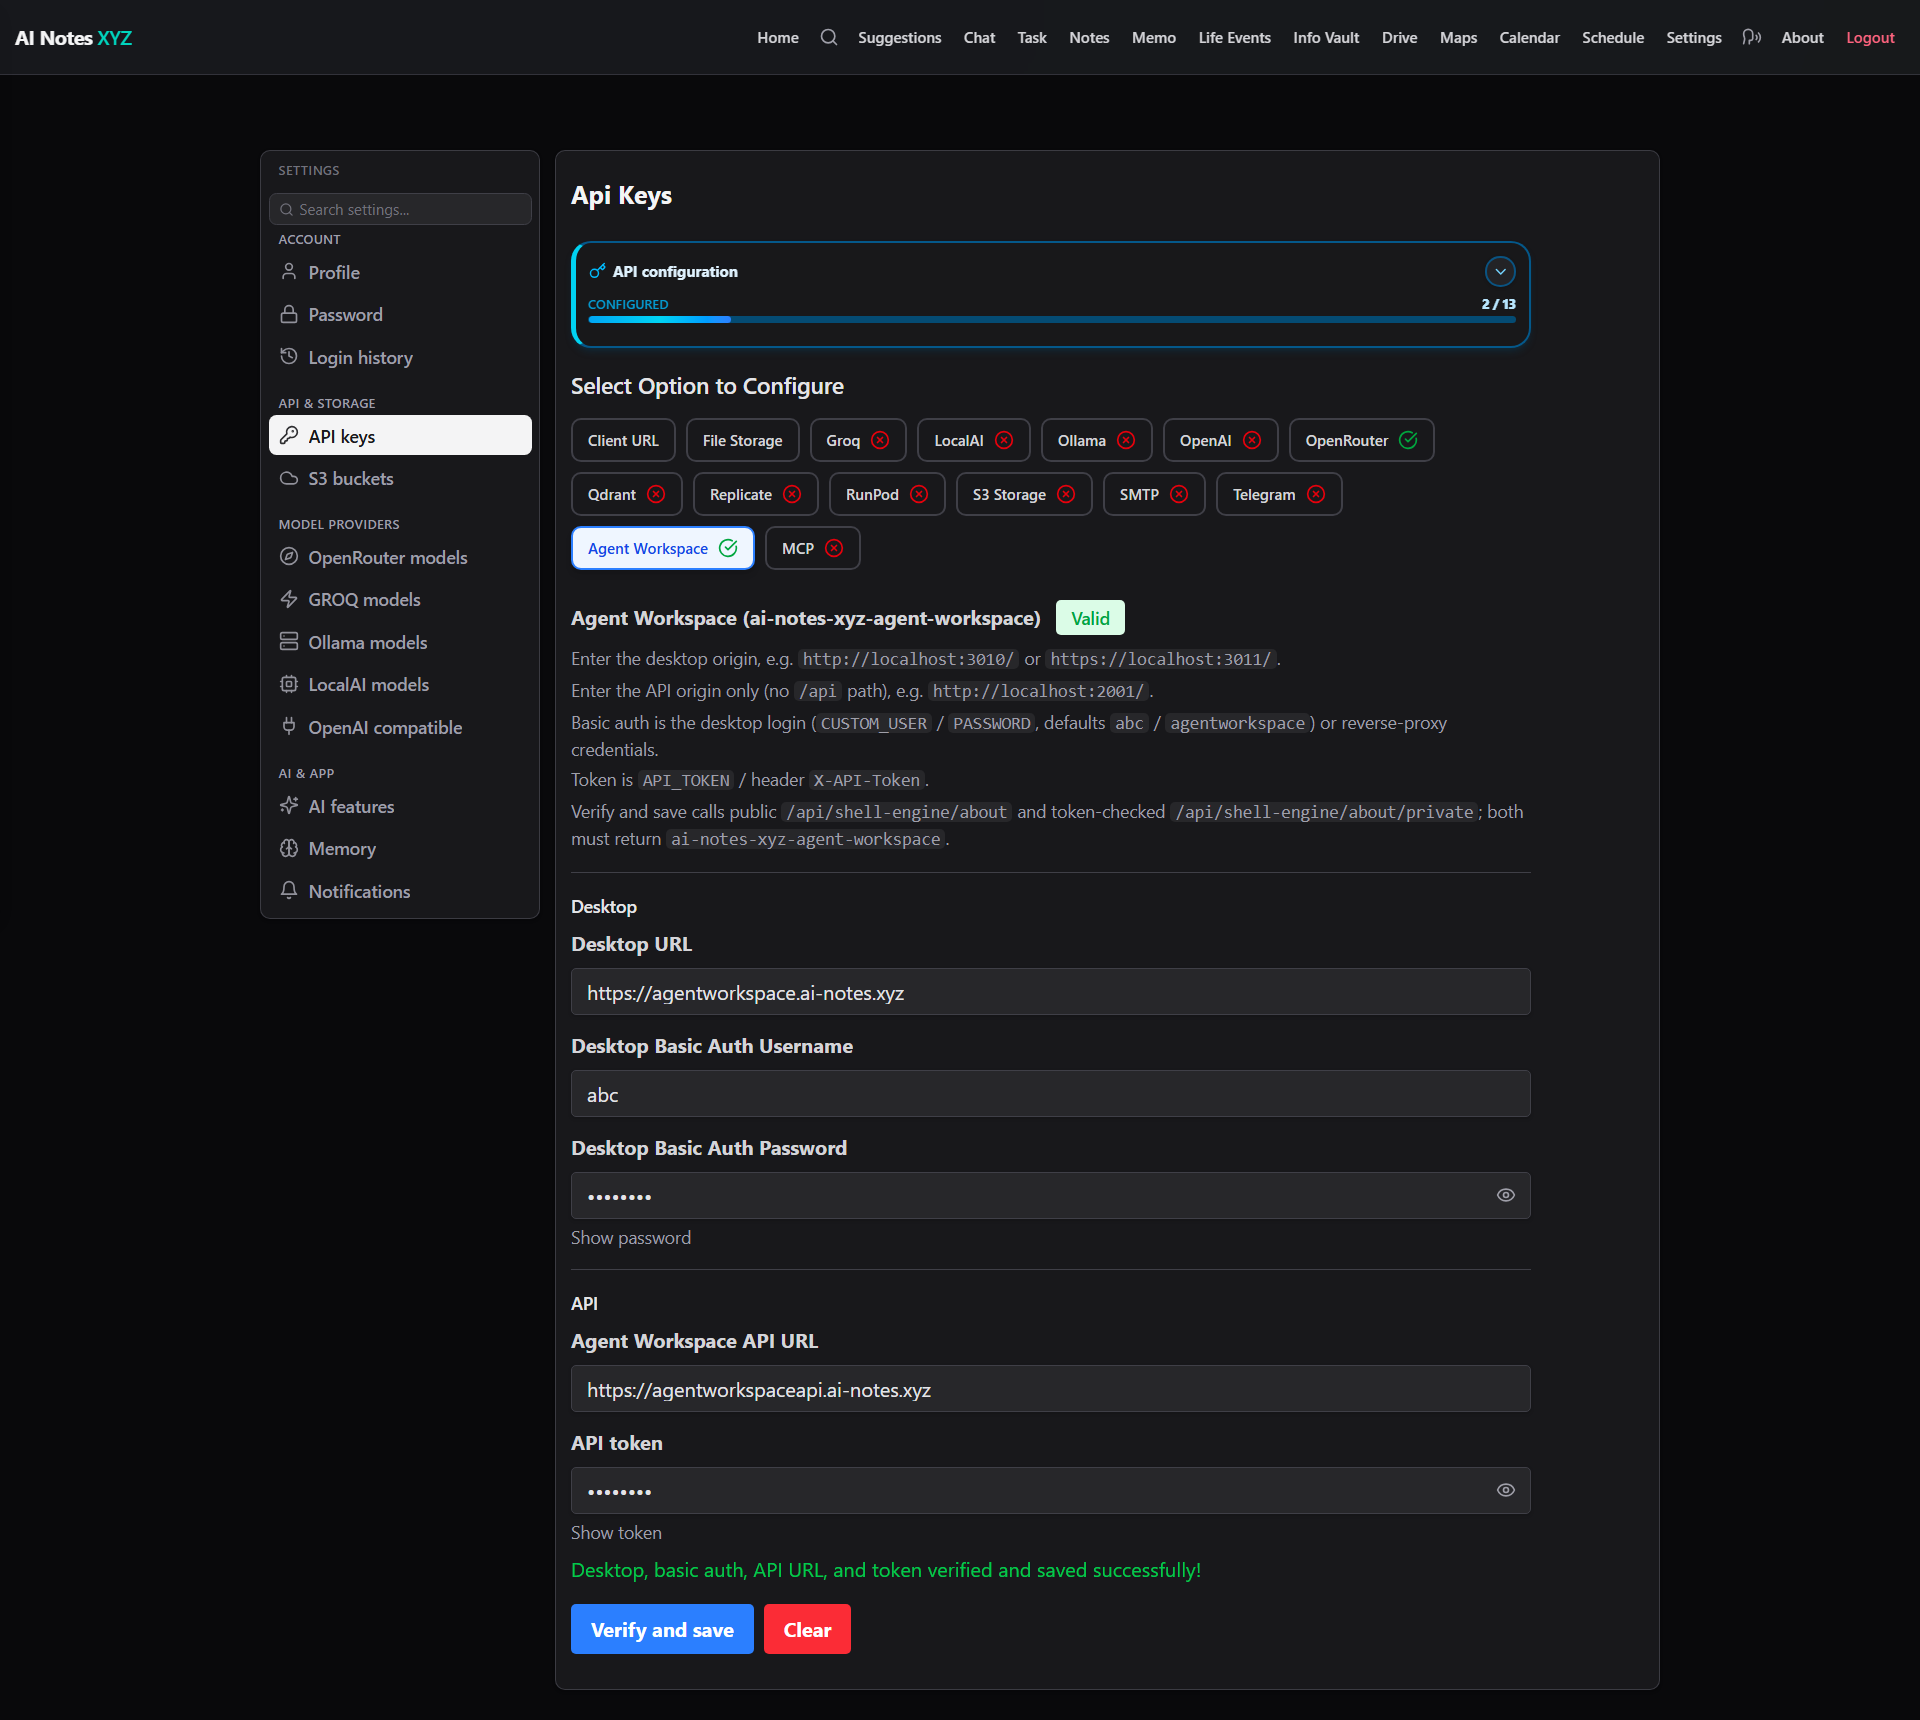
Open the main AI Notes app. Go to Settings → API keys. Click Agent Workspace.
Paste:
- Desktop URL — the desktop origin, like
https://workspace.example.com(no path) - Desktop Basic Auth Username —
CUSTOM_USER(defaultabc) - Desktop Basic Auth Password — the same
PASSWORDyou set in Coolify - Agent Workspace API URL — the API origin only, like
https://workspace-api.example.com(no/apiat the end) - API token — the same
API_TOKENyou set in Coolify
Click Verify and save. A green Valid badge means it worked.
You are done.